 As you can see it's
built on a sheet of peg-board. Peg board is light, provides a built-in grid,
and the holes make under-surface wiring easy.
As you can see it's
built on a sheet of peg-board. Peg board is light, provides a built-in grid,
and the holes make under-surface wiring easy.A real attraction of this for me is using the track systems to create new layouts. The standard track pieces follow standard geometries, and the little booklets that come with them illustrate fairly standard layouts: mostly variations on the basic oval. But there are lots of possibilities.
Personally, I like S-curves, and overpasses, and I prefer double layouts that can have two trains running in opposite directions.
There is software you can buy to plan layouts, and there is less sophisticated software that's free. So far, I'm on the cheap stuff.
Note: I am planning to add video to this page, but as of this writing (early 2014) I'm unsure of which way to format it, old Java or new HTML5. So for now, I'm holding back on adding new video links, and some old ones already in place may not work.
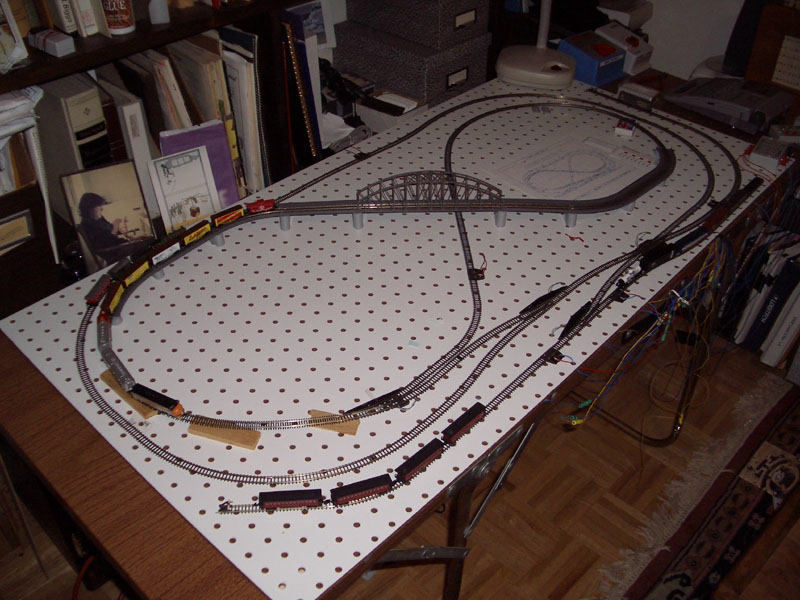
Here's one of my first successful layout designs. As you can see it's
built on a sheet of peg-board. Peg board is light, provides a built-in grid,
and the holes make under-surface wiring easy.
The layout was basically a figure eight, with a long s-curved ramp/bridge section at the crossing. There are a couple of long sidings added where I'd been experimenting with track isolation, block control, signaling and the like. I use the peg-board for a base to hide some of the wires, and also to provide a reference grid. Obviously, I wasn't into realism or decoration at this point, just making the trains go 'round.
The next layout was a similar figure 8 / overpass combination, with a
second independent track around it.
 Simple cross-overs connect the two
sections, and more substantial sidings and 'marshaling areas' provide for
storage and 'play' space.
Simple cross-overs connect the two
sections, and more substantial sidings and 'marshaling areas' provide for
storage and 'play' space.
This layout gave me my first experience with flex track, and really challenged the little engines to make it up the grade hauling anything like a real load. The potential for nice pictures went up with trains passing each other in the same direction on one side and in different directions on the other. Very neat.
My first 'real' and permanent layout is below. It is 'decorated' and
gave me a platform to see just how bad a painter / scenery constructor I really
am.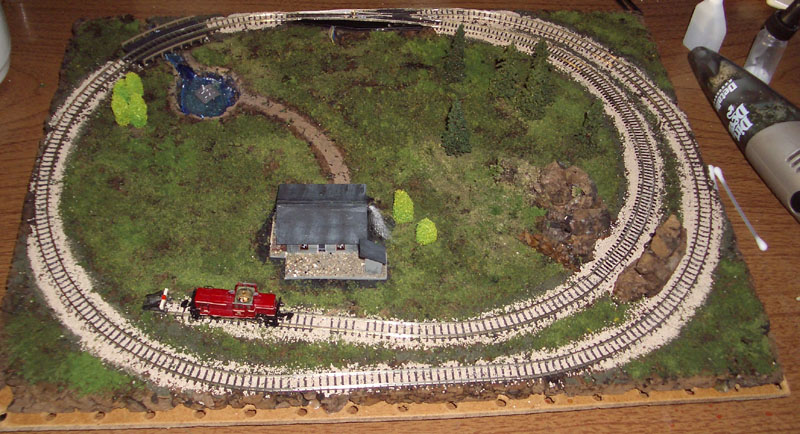 It's a tiny oval with a small curved
interior spur, and it all fits under the plexiglass cover of my old AR
turntable. I tried adding ballast to the track (bad idea) and I put
commercially-made building (a hillbilly still, actually) off the interior
spur.
It's a tiny oval with a small curved
interior spur, and it all fits under the plexiglass cover of my old AR
turntable. I tried adding ballast to the track (bad idea) and I put
commercially-made building (a hillbilly still, actually) off the interior
spur.
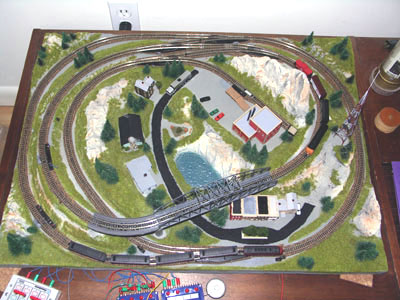
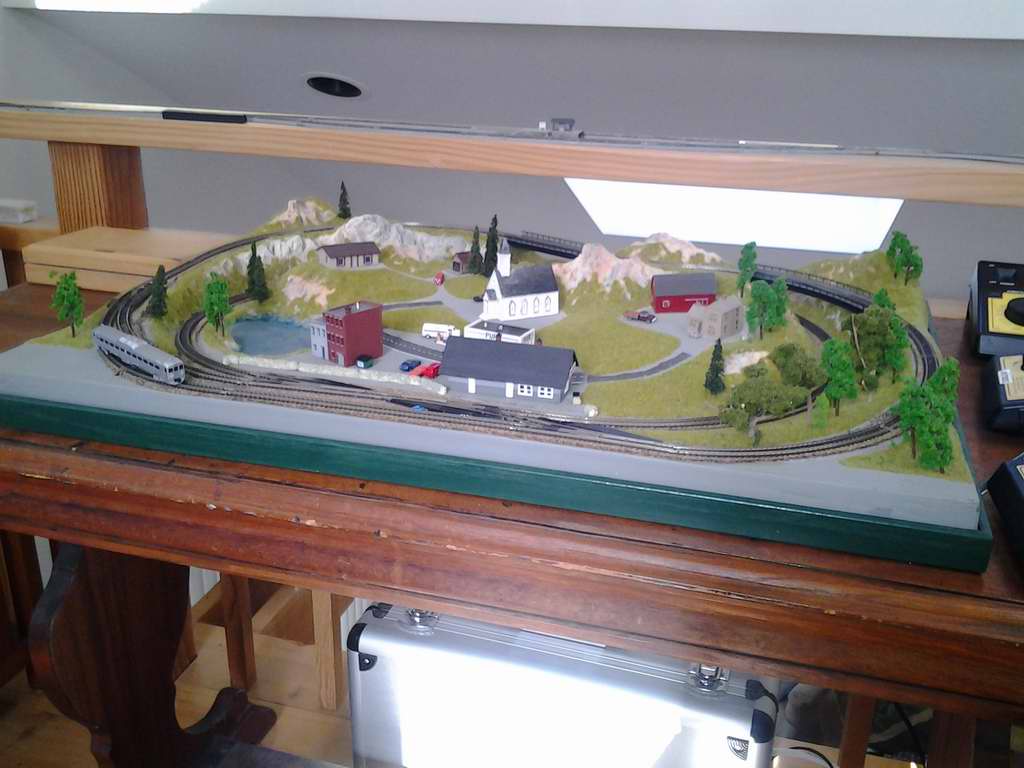
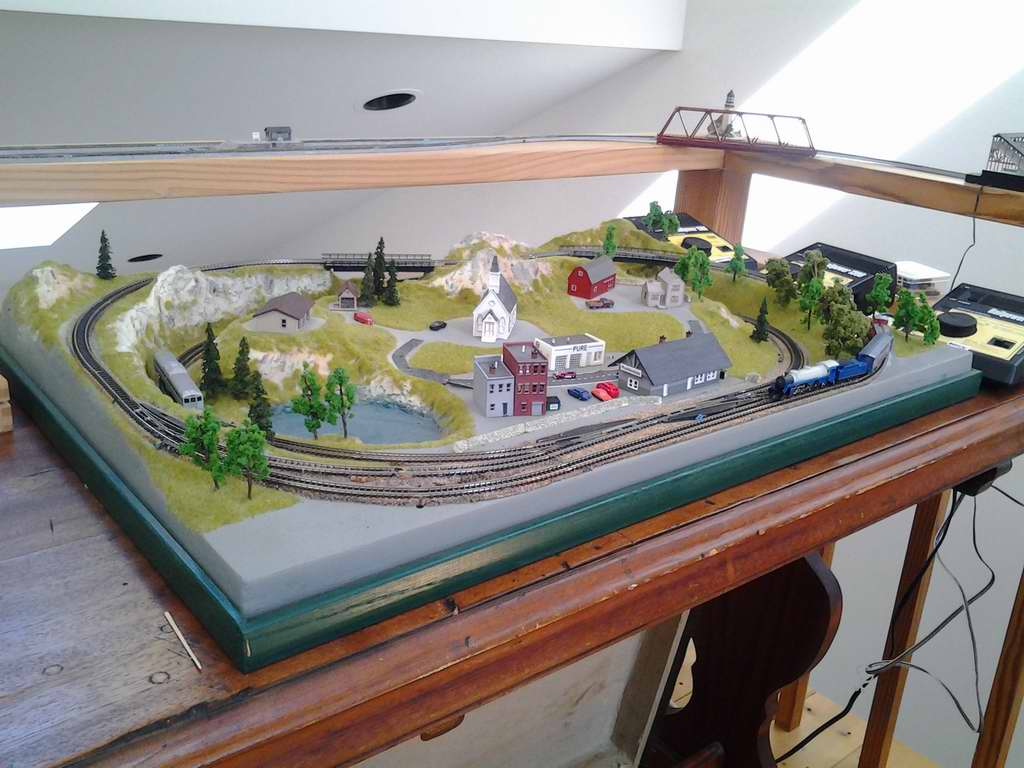
Most recently I've acquired a couple of the cast foam layout boards which are made by Noch. These boards have minimal decoration, but provide interesting up and down geometries, with overpasses, ravines, and real fake landscape.
Here's the one I've started; this used to be sold as an 'American Layout 509' by Märklin but was called 'Barenweiler' by Noch. I bought it used and a little beat up. I re-laid the track to the original specifications, and rewired the switches and the circuit tracks which had been added by the original builder. The nice signals were, alas, inoperative, but I've retained them as decorative touches.
 If you click the image you'll get a
page with a lot more images.
If you click the image you'll get a
page with a lot more images.
The layout includes a freight depot area off the spur in the middle, space for a few houses along the road and either a station or a main street in the front. I'm still picking up odds and ends of decoration. My favorite part is a tall TV tower on the top of the hill on the right, between the two tracks.
This layout can be set up to run two trains on two loops in opposite directions, or with the use of the circuit tracks and automatic switching, one train can travel on a continuous loop in either direction around the outer and inner sections.
The difficulty with this layout and other small and medium scale commercial layouts, is the 'up and down geometries mentioned above, combined with the tight curves. The little locomotives have some difficulty with the curves and grades, especially if you assemble anything longer than a two or three car consist. Steam engines, with all their wheels aligned in a rigid frame, have real problems on the curves, as well. I find it almost impossible to run a steam engine and tender around Barenweiler by themselves! And my favorite engines are steam locomotives. Ah well
At the present writing (2014) this layout is in semi-retirement in cellar storage.
One of the ideas I had when I got into this model traiin stuff was to build a small layout on the bay window sill in my office. It's not a big enough space for a practical loop (especially with Marklin track,) so I built a relatively simple back and forth layout that used a reversing timer device from the great Lajos Thek. Originally I thought of it as another 'practice' layout, built on homesote with an assortment of left-over structures, but I grew to like it. I re-wired it and added some framing to keep it from warping too much.
The active track was the red path. The long sidings had independent power and could be used for switching, although they usually were just used for display. In real life it looked like this:
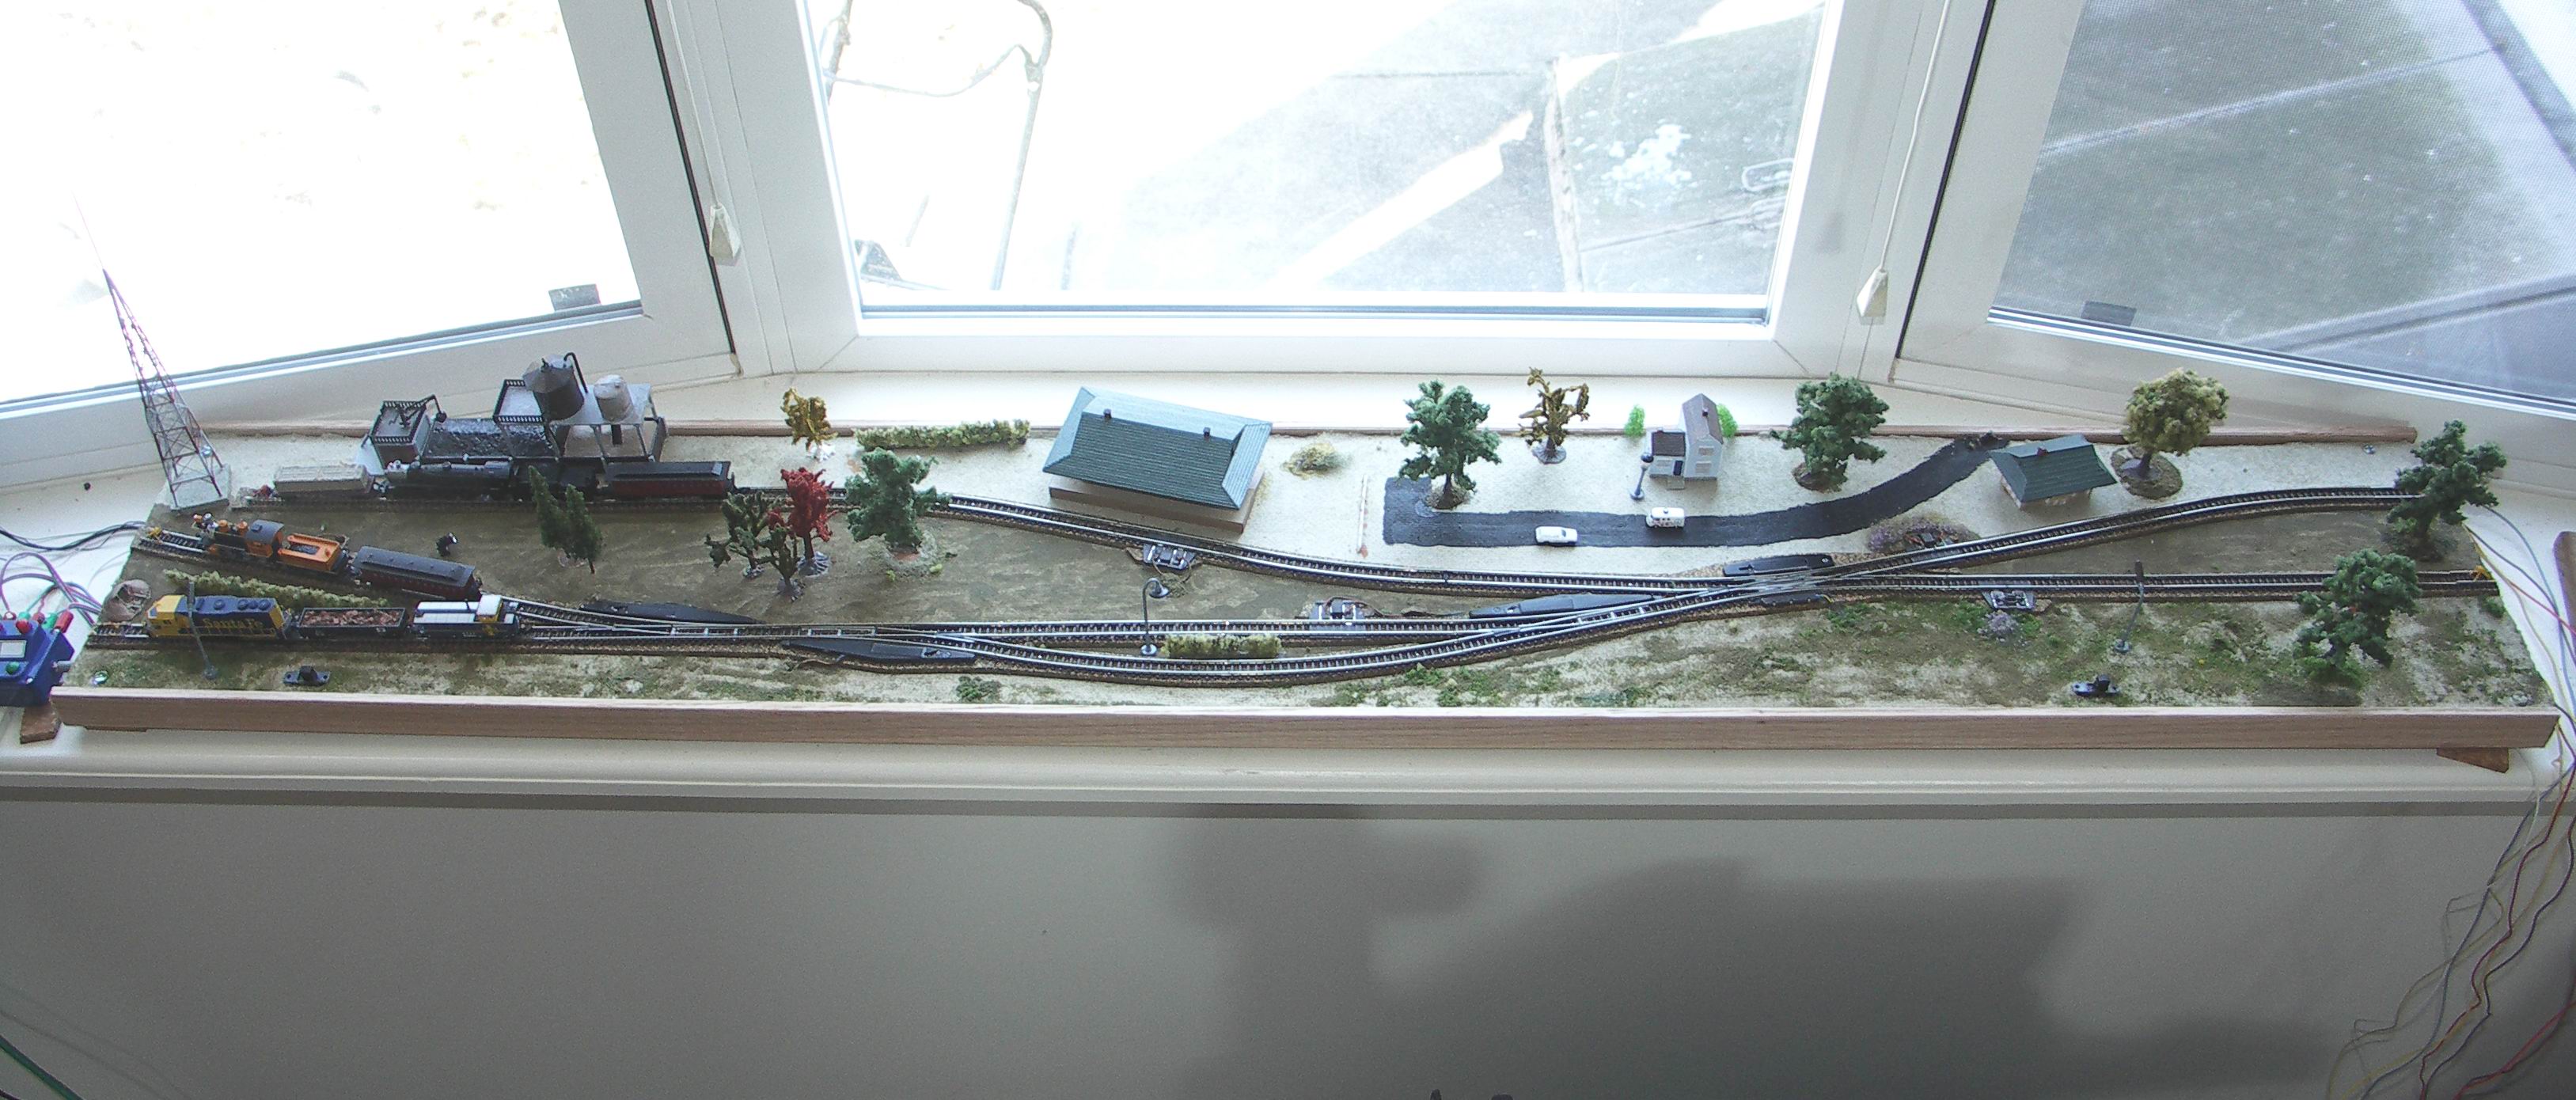
Since it was all Marklin, the siding switches could be set up so that the train would take one path left to right, and the other path right to left, without any intervention by me or circuit tracks or the like. Most locos can easily 'push through' a Marklin switch that is 'closed' and there is no power routing to prevent travel either way.
It was homosote, however, and there was an incident with a bird that came in through the fireplace... lots of damage. So I got ambitious and decided to build a more complicated, longer layout with two active tracks, two levels...
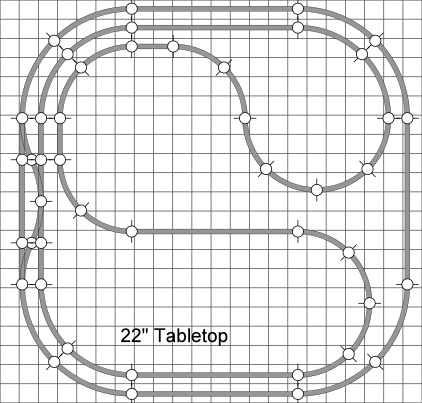
And the new layout plan looked like this:

It was made on a pink foam base, not homesote, fits the space better, and has two levels (the green is the upper level.) A new Dallee controller provided separate back-and-forth control for each level, and there were still plenty of sidings for display. This is what it actually looked like:
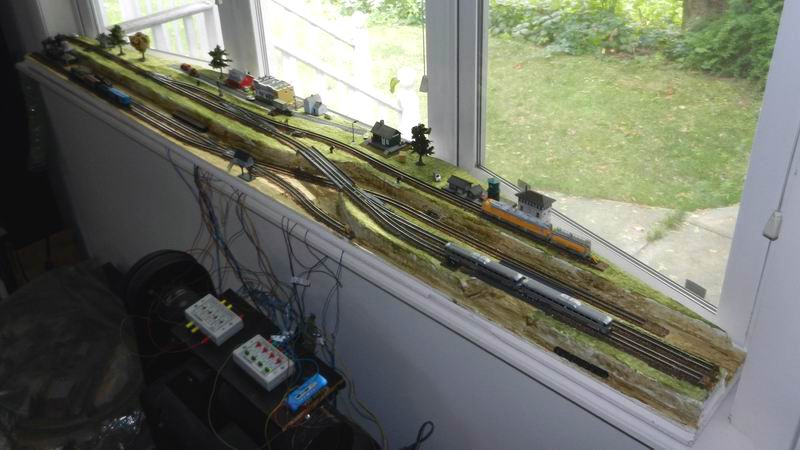
The wiring was messy but the lights and switches and sidings all worked (most of the time.) The track needed more or less constant adjustment, but the locos did run back and forth (with the occasional nudge) and the over/under bit was exactly what I had wanted.
But it was too messy, and had too many flaws. the long sidings were barely functional, and.. well it was really messy.
Both windowsill layouts are now torn down, so of course I'm thinking about building another one. Stay tuned.
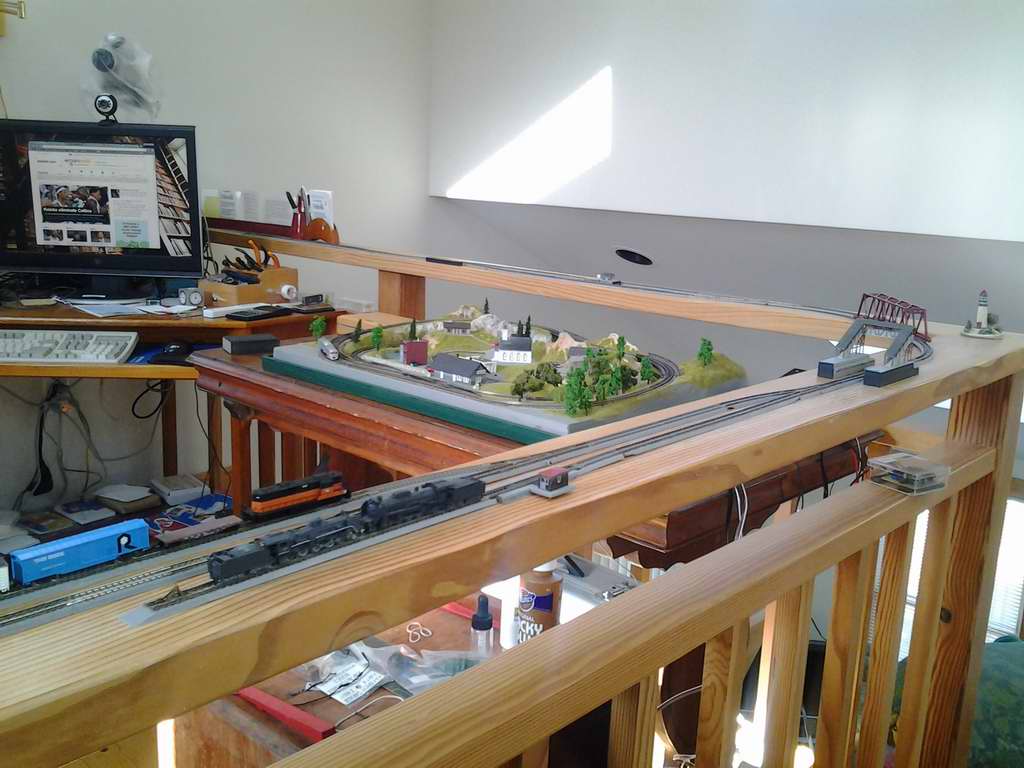
i bought this as a plain foam base and waited a long time before working on it. It was built, torn down, rebuilt and finally moved to my summer house and completed. In its final state, this is what it looks like:
This is my favorite and most successful layout so far. And running along above it you can see the fabled...
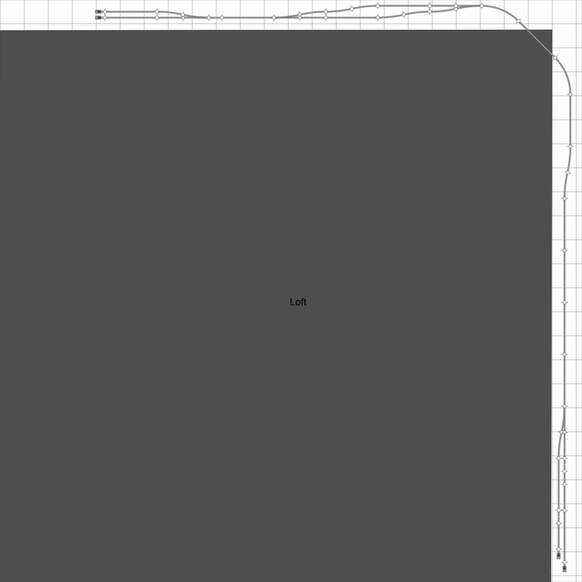
My place on Cape Cod has a loft space which is surrounded by a railing with a flat top. Naturally I built a layout on it. I call it the 'Bannister' because I love misnomers, and also because the unwary coming up the stairs will use the railing as a bannister for the last few steps, grab it at the point shown in the photo below, and smash the layout and the trains.

It's a hard layout to photograph or diagram:
 |
 |
I used Rokuhan track, which is my track of choice these days. Alas, even in their 'non-power-routing' configuration, Rokuhan switches still prevent locos from 'pushing through' a closed switch, so my trick from the older windowsill layouts of having the train take a different path in one direction really doesn't work. And because I'm not sure about keeping this whole setup in place, there's basically nothing holding the track down, and nothing much to prevent the locos and cars from falling a long way down if they get knocked over. Still, they look good going through the girder bridge that cuts the corner.
A.K.A. 'The Torture Test." More on this later.
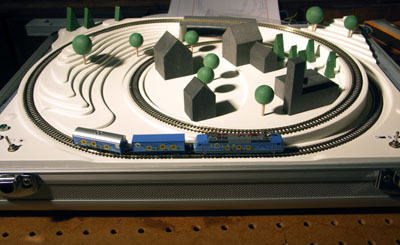
Of course, no discussion of layouts can be complete without the amazing (well, at least interesting) Marklin Solar set, which a bunch of people bought when they turned up at deep discount on eBay. Self-contained and somewhat bizarre unless you like the barren abstract look, but it is how I run my trains at the Cape! The layout is in a case, and the 'top' of the case contains a large solar cell which can power the set and/or charge the built-in battery. Amaze your friends!
I'm more of a 'runner' than a collector, but still, I've acquired a lot of stuff and some means of display is useful. I want to protect the little buggers, keep them clean, but also show them for what they are.
I bought some small display boxes from Imex, and set engines and cars onto a piece of track. The case kept everything clean. But it was a little sterile.
Then I spotted (and bought) some small plastic dioramas from Japan on eBay. Set a train in the little diorama, put the diorama in a little plastic display case, and voila! Except I was bugged by the fact that the diorama didn't fit the case exactly. (Hey, I'm like that.)
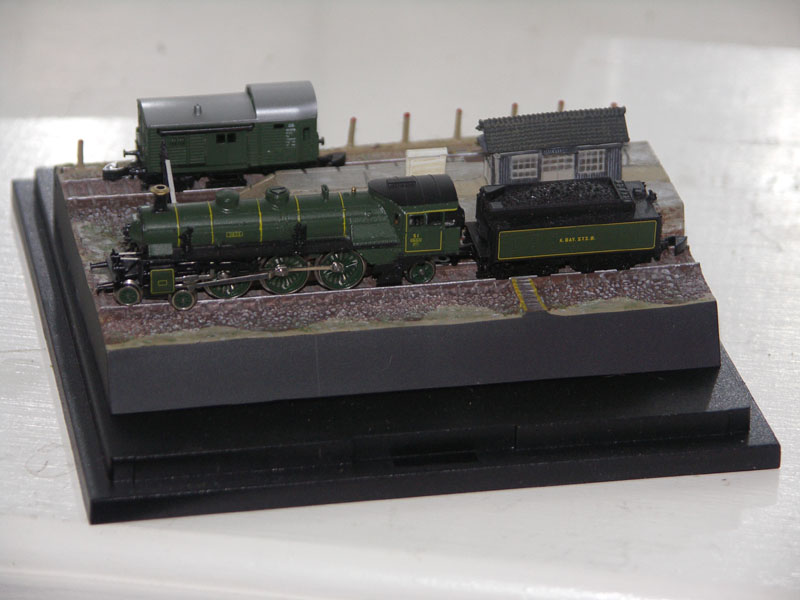
So it was only natural to use my left-over landscaping materials to start custom building dioramas: cork base, some track, maybe a small building, foliage, and there you have it.
Here's a page with a few early examples. I'm planning on adding some smaller boxed for fancy individual cars and bigger examples, with multiple tracks and elevated sections, for engine-tender-caboose combinations, and car sets.
![]()
![]()
![]()
This document maintained by rgm at
fabbnet.net.
Material Copyright © 2001 - 2011.